Saturday, April 29, 2017

Dream Pillow

The dream pillow project is for homeschool and Chickadee's first time to hand sew! She chose the same fabric she chose for the beanbags we made for homeschool in the fall: hot pink with white polka dots. I sewed down the side I'd leave open for her to fill and sew shut. Then I folded it in half and sewed the other two sides together. We picked some calming dried herbs from my stash: chamomile, lavender, rose petals, and lemon balm.


Then I pinned it closed, and tucked the ends into the fabric. I threaded the needle and knotted it so that she wouldn't lose the needle from the thread for her first sewing project. I will say the negative is that mistakes are more difficult to fix, because you can't simply pull out the thread to the point of the mistake. She didn't quite understand the pulling the thread all the way through on each stitch before starting the next stitch.


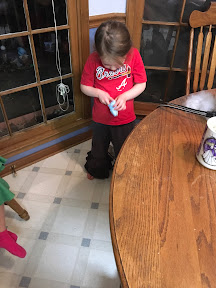
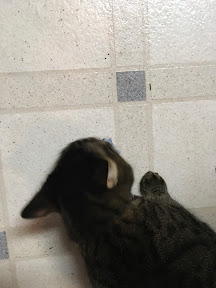
She was so excited to start the sewing part of the project, because she felt it was a big deal to be able to hand sew on her own.


I let her do it on her own while I stayed nearby to help with struggles. She used the overcast stitch as advised in the curriculum. She was really proud when she reached the end of the line.


I feel like she did well for her first time hand sewing.


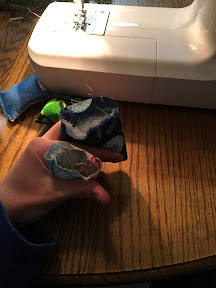
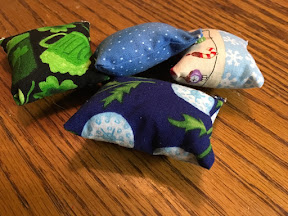
We needed to go back and close the gaps so the herbs would stay in the pillow. It took a couple of tries for her to figure out what was needed. We sat right next to each other and took turns doing the stitches. It was hard for her to coordinate just where the needle should go on the closer stitches. Once she slowed down and figured out what was needed, she was so proud of herself!


Being able to switch gears from letting her have some independence to try her hand at sewing to snuggling up on the couch and working through the details together is one thing I love about homeschooling! I also switched gears on the needle and thread to give her that experience, and in the end, I think it made things easier. She actually only pulled the needle off the thread a couple of times near the end.


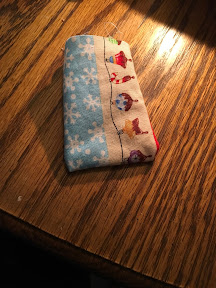
Now she's ready for sweet dreams.


Thursday, February 2, 2017

Sewing Gifts for the Cats

On December 16, the fairies asked us to make gifts for the cats. We took some fabric scraps and fat quarters and cut them into rectangles that were approximately 3" by 6". Our girlie picked out one fabric for each of our cats. She had a friend over that day who also has cats and joined in the fun by helping make some for her cats too.

I folded each rectangle in half and sewed up the two long sides, leaving the top open for stuffing.


We used polyester stuffing (I know, it's not very Waldorf of me! 😉) and catnip to fill each little pouch. Then, I simply turned in the end and sewed it closed with the sewing machine. Super easy, and no hidden stitches. Still time consuming though!


The girls were super pleased with their gifts for the cats. The cats found our prototype and loved on it (drooled on it) immediately! They were happy to receive their gifts on Christmas, too.


Tuesday, January 31, 2017

Feeding Our Backyard Birds

On December 14, the fairies left pine cones outside our fairy door with a note telling us to make bird feeders.


We started by placing the pine cones in the oven to dry and open them. I put the peanut butter in as well to make it easier to spread.


She spread the peanut butter on the pine cones and then sprinkled on the bird seed.


Then I figured out the hard way that it's best to wrap the pipe cleaner on before covering the pine cone with peanut butter and bird seed! LOL!


She really enjoyed going outside and hanging them as well as making them. We were hoping to see the birds flock to the tree, but it took some time for them to find the food.


Monday, January 30, 2017

Stamped Thank You Notes

The fairies came back in January and suggested we start the year in gratitude by making and writing thank you notes for all the gifts we had received over the holidays. Well, it took us a few weeks to do it, but it was a fun way to practice a bit of gratitude.

It also taught me that I can be a bit of a perfectionist (no surprise there!) when it comes to making things for other people. I did a lot of breathing and cutting myself off mid sentence to get through it. LOL! In the end, they are really charming and full of character and something she enjoyed.

My favorite part was taking dictation from her about her gifts. She has such a sweet heart, and it's fun to give her an opportunity to express it!


- Posted using BlogPress from my iPad

Sunday, January 29, 2017

Breaking In Our "New" Colored Pencils

One thing I love about working with children is that they inspire so much creativity! It was true for me as a Waldorf teacher, and it is definitely true of me as a homeschooling mom...when I allow it! And today was that day!


I bought myself a set of nice colored pencils back in May as kind of a Mother's Day gift to myself...ok, it's January, and I haven't used them yet! I bought her a pad of paper for us to draw together back in August as part of our homeschool supplies...hadn't used that yet. I gave her a set of colored pencils over the holidays...because she has not alternate to-do list or other agenda, those puppies have been used! But today, we finally drew together, like I have been aching to do since I bought those pencils in May.


She wanted to draw a beautiful girl in a pink and black dress and wanted help. So I set us up on the kitchen table and threw out the to-do list, because this felt like it needed to be a priority. And then I just started drawing. I told her a little bit about what I was doing, and she drew right alongside me. Once we had finished drawing our beautiful girls, I asked where we wanted her to be. She said at a wedding. So we added in a red carpet for her to walk down and put flowers in her hand. Then we decided it should be outside and added grass and sky. Viola! We were done. She was ready to move on to the next drawing, but dinner time had arrived. I took the time to date and title the back of each of our drawings. Then we took the time to lovingly put away our drawing materials so they would be ready for us again. I really want to keep doing this with her. It felt so good to sit down and be creative together!


- Posted using BlogPress from my iPad

Thursday, December 15, 2016

Pre-needle Felted Ornament

On the 13th day of Advent, the fairies left a note instructing us to use some wool roving to make a pre-needle felted animal ornament.

Girlie chose a reindeer cookie cutter and bright pink and purple roving for her ornament. We stuffed the wool into the cookie cutter and sprayed a little bit (less than you think) water mixed with a tiny bit of Dr. Bronner's peppermint liquid soap.

The next step is using a chopstick to mash it down into the cookie cutter and start working the fibers together. We've done this before as part of our Waldorf homeschool curriculum, and it feels like a soggy mess at first. We added a bit more wool to help soak up the moisture.

The cookie cutter will need to be turned over while keeping the wool inside. I simply placed my hand over the top of the cookie cutter and turned it over cutting board and all to keep it together. That way the chopstick can work the wool on both sides.

Continue turning and poking until the wool is dry and mostly together. In the couple of times we've done this, we had some wool that just wasn't sticking. Maybe we added the wool too late into the wetting and poking process. We tried using a fork, but to no avail. Both times, I simply touched it up with a felting needle to get the wool to stick.


Tuesday, May 15, 2012

Mother's Day Gifts

This year for Mother's Day, I put together little herb gardens for gifts. An article from MaryJanesFarm Magazine inspired the idea. I reused berry trays, lined the bottoms with fabric, and added the soil and seeds. I printed directions on some pretty card stock and dressed them up with stamps. When tied on with some ribbon, they were ready to be presented as gifts.